Categorie: WordPress
-

Create Elementor migration/upgrade scripts
Every now and then, you may need to migrate something on existing Elementor widgets. One solution would be to go through every single template and change it by hand, but we’re not savages. Note that migration in this context means that we have the widget in place but we update some of its values. So…
-

Cum migrezi un WordPress multisite?
Una din problemele cu care mă confrunt frecvent este aceea de a migra o instanță de WordPress de pe un domeniu pe altul (e.g. din live în development). La site-uri simple este o operațiune rapidă, wp search-replace url.vechi url.nou, dar lucrurile se complică atunci când este un multisite și/sau are o bază de date imensă.…
-

Actualizarea plugin-urilor WordPress și versionarea acestora
Deși sunt adeptul ideii de a nu ține în Git fișierele care nu-mi aparțin: plugin-uri, fișierele din core etc, sunt unele situații în care este nevoie și de asta. Prin urmare, nu am acordat prea multă atenție acestui mod de lucru: când e vorba de actualizări disponibile, facem actualizare la tot, trântim un commit cu…
-

WordPress menus are lost on server migration!
I had this issue for a very long time: a live server with a bunch of menus was allright. Trying to migrate the DB locally (for syncing), usually ended up in a mess, because menus were gone. No matter what tools I was usings, be it mysqldump, migrate db or anything else, menus were GONE! …
-
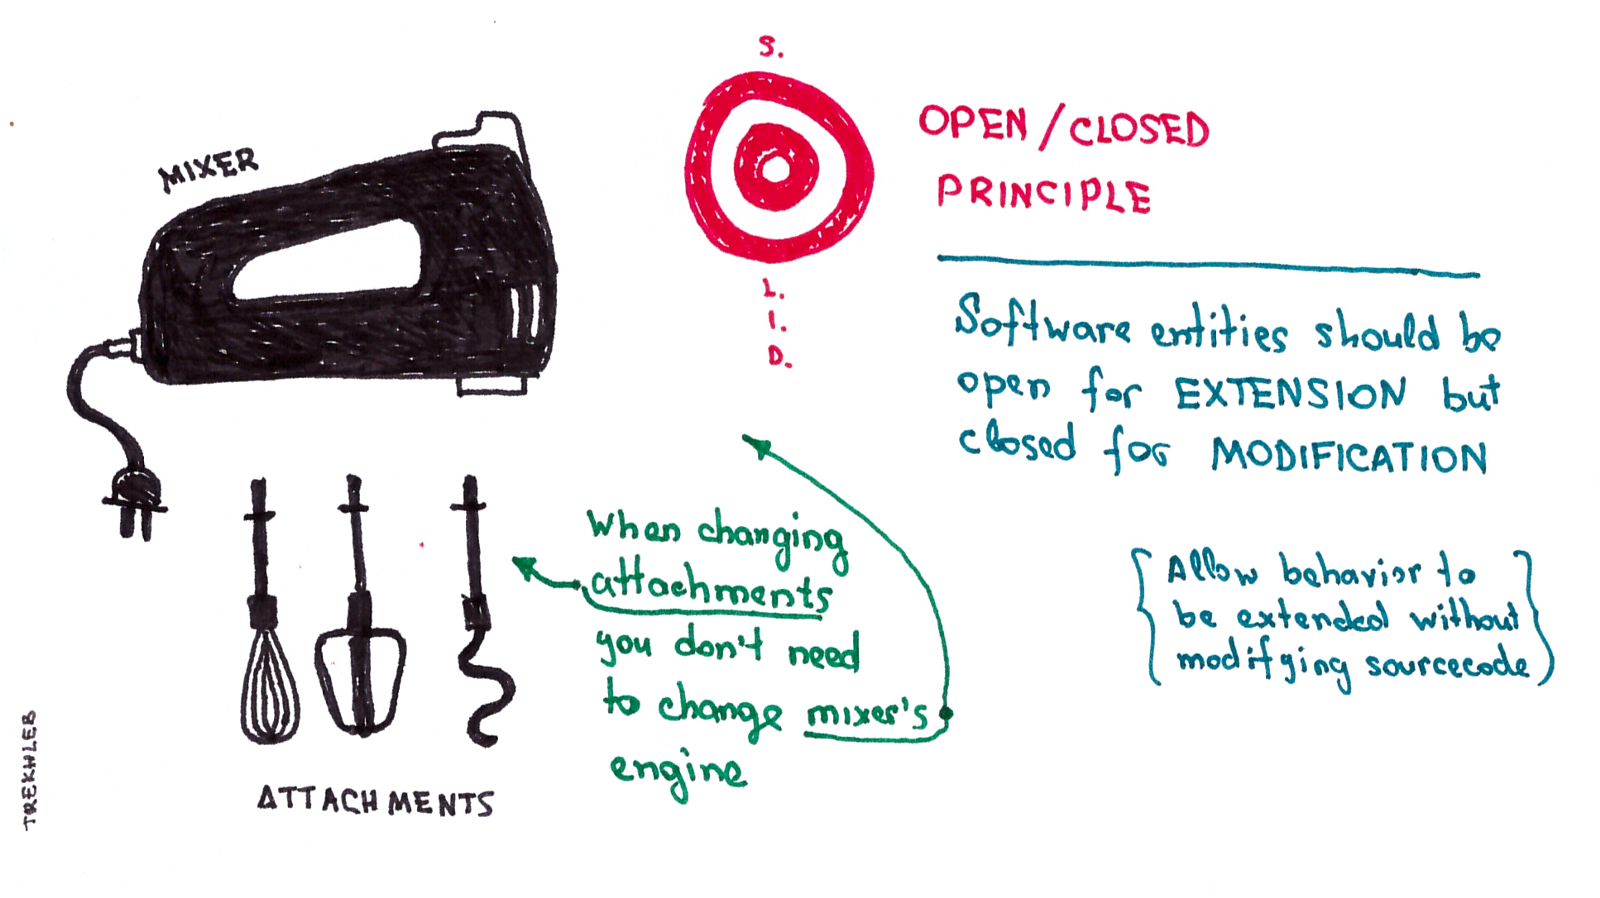
Un mod simplu de a implementa „Open-Closed principle” în WordPress
OCP este unul dintre principiile SOLID despre care am mai scris și aici. Vreau să-ți arăt o modalitate simplă prin care poți implementa asta chiar dacă nu ești fan OOP: folosind filtre! Sigur, nu este foarte încapsulată toată povestea, dar cred că este un compromis care merită făcut în majoritatea cazurilor. La proiectul la care…
-
Using TGMPA with GitLab’s CI artifacts
TLDR: set some headers, see below. TGMPA TGMPA is a WordPress plugin that helps you to manage your theme dependencies. Just imagine your users experience: instead of ask them to check a README doc that recommends installing various plugins (and no way of enforcing them to do so), this panel will show up everywhere they…
-
Customizing Elementor’s default widgets
If you’re using Elementor for client work, probably you’ll hit some limits soon enough. Like, for example, you can’t customize buttons aspects on all widgets. Although is never documented, it is possible and I’ll show you a way of doing this. The example? Call to action widget (available only on Elementor Pro). By default, you…
-

Pre-popularea meniurilor în WordPress
De multe ori se întâmplă să fie nevoie să am meniurile gata pregătite în WP. Să fac un fel de seed la DB. Cum procedez? În primul rând, facem un array cu elementele de meniu. Majoritatea sunt doar pagini, dar sunt situații în care vrem ceva mai… custom. De exemplu, vrem să adăugăm o anumită…
-

WordPress: Încărcarea dinamică a articolelor cu un anumit term
Zilele trecute am avut următoarea situație: În backend: o taxonomie custom cu câteva zeci de terms În frontend: afișez ultimele zece articole dintr-un term + buton de încărcare a următorului term. Prima idee a fost: încarc toate articolele dintr-un foc și fac toggle la vizibilitate cu JS. Dar se ajunge lejer la câteva sute de…
-
Selectarea categoriilor cu ajutorul Carbon Fields
Despre Carbon Fields am scris atât pe blogul personal, cât și pe forum și am tot început să-l folosesc la diverse proiecte, având tot felul de provocări, care mai de care mai interesantă. Ultima? Să pot permite selectarea unei singure categorii pentru un anumit post. Soluția e foarte simplă și are câțiva pași simpli. Evident, în…
-
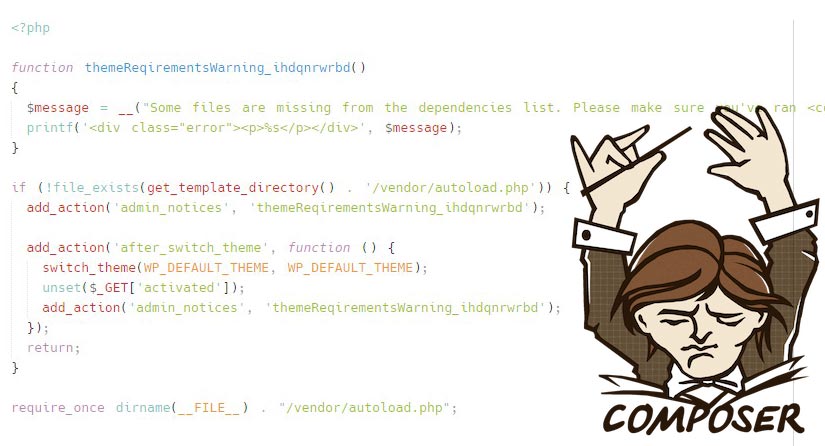
Folosești Composer în tema ta WordPress? Evită erorile la instalare!
De fiecare dată când folosesc Composer într-o temă sau într-un plugin încerc să am grijă de momentul în care trebuie să pornesc de la zero cu respectiva temă (sau plugin). Cum folderul vendor este ignorat de Git, sunt șanse destul de mari ca tot codul meu să rezulte într-un minunat ecran alb (dacă erorile sunt oprite).…